Medora Dental Care

Author name: manish

Teeth Whitening for Sensitive Teeth
Uncategorized

Teeth Whitening for Sensitive Teeth: What Actually Works

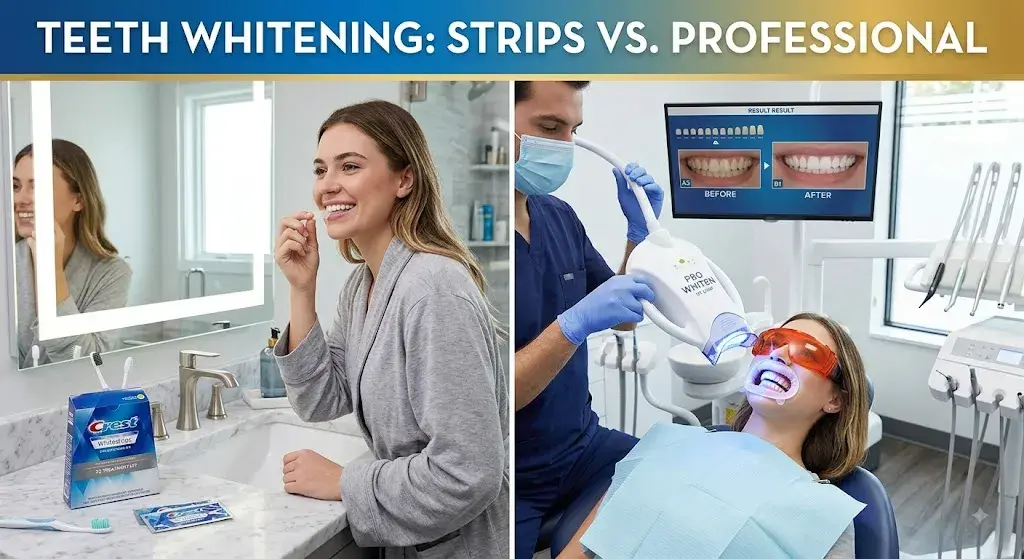
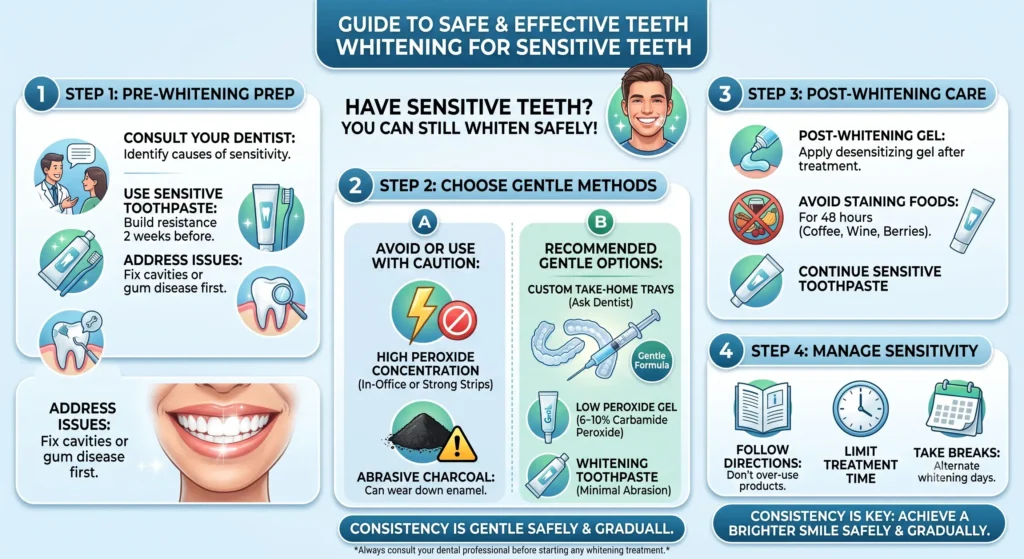
You want a brighter smile, but the last time you tried a whitening strip, your teeth throbbed for two days afterward. So now you’re stuck: keep living with stained teeth, or risk another round of pain? Here’s the good news. Having sensitive teeth doesn’t rule out whitening — it just means you need the right approach. Teeth whitening for sensitive teeth is safe and effective when the concentration, timing, and pre-treatment steps are managed properly. The problem isn’t whitening itself. It’s that most over-the-counter products are built for average enamel, not for teeth that are already reactive to cold, heat, or pressure. This guide walks through why sensitivity happens, what actually helps, and what a dentist does differently that a drugstore box never will. Why Do Teeth Become Sensitive During Whitening? Whitening products work by using hydrogen peroxide or carbamide peroxide to break down the stain molecules trapped inside your enamel. To do that, the peroxide has to penetrate through microscopic channels in the tooth called dentinal tubules. In someone with healthy, thick enamel, this process barely registers. But if your enamel is thin, worn, or your gums have receded, those tubules lead almost directly to the nerve inside the tooth — and that’s where the zinging, aching sensation comes from. A few specific conditions make this worse: This is also why teeth sensitivity after whitening is common even in people who didn’t consider their teeth “sensitive” beforehand. Any whitening treatment can cause temporary sensitivity — the difference is how intense it is and how long it lasts. Is It Safe to Whiten Sensitive Teeth? Yes, in most cases. Sensitivity on its own isn’t usually a reason to avoid whitening altogether. It’s a reason to change how you whiten. The people who end up in real pain are almost always using a product that wasn’t matched to their situation: too much peroxide, too long a wearing time, or no desensitizing prep beforehand. That said, there are a few situations where you should talk to a dentist before starting any whitening treatment, including gels or strips bought over the counter: If any of those apply, book a checkup with our family dentistry team first. Whitening works best — and hurts least — on a mouth that’s already healthy. In-Office vs. At-Home Whitening: Which Is Gentler on Sensitive Teeth? This is the question we hear most from patients with sensitive teeth, and the honest answer is: it depends on how each option is used, not just which one you pick. In-office whitening uses a stronger gel, but it’s applied under direct supervision. Your dentist can apply a protective barrier to your gums, use a desensitizing agent beforehand, and stop or adjust the treatment the moment you feel discomfort. The session is also shorter — usually 60 to 90 minutes — so your teeth aren’t exposed to peroxide for hours on end. Custom take-home trays from your dentist are gentler by design. Because the tray is molded to your exact teeth, the gel stays where it belongs instead of pooling against your gums (which is a major cause of irritation with generic drugstore trays). You also control how long you wear them each session, which gives you more flexibility to ease into treatment slowly. Over-the-counter strips and generic trays are the roughest option for sensitive teeth. They’re not customized to your mouth, so the whitening agent often touches your gums directly, and there’s no professional there to catch a bad reaction early. We break down full pricing for each option in our teeth whitening cost guide, and you can read more about how each method works step by step in our guide on how to safely whiten your teeth. What a Dentist Does Differently to Prevent Sensitivity This is the part most whitening guides skip entirely, and it’s the actual answer to “what works” for sensitive teeth. 1. Desensitizing pre-treatment. Before applying whitening gel, we can apply a fluoride or potassium nitrate treatment that calms the nerve endings inside the tooth. Potassium nitrate works by blocking the pain signal from reaching the nerve, so it’s genuinely effective — not just a marketing ingredient. 2. Controlled peroxide concentration. Professional gels range widely in strength (roughly 15–43% for in-office use), and part of a dentist’s job is choosing the lowest concentration that will still get you the results you want. Store-bought products don’t offer this flexibility — you get whatever concentration is on the shelf. 3. Protective isolation of the gums. In-office treatment includes a barrier gel or rubber dam that keeps the whitening agent off your gum tissue, which is where a lot of at-home irritation actually comes from. 4. Shorter, monitored application cycles. Rather than one long exposure, in-office whitening is usually done in shorter bursts of 15–20 minutes, reapplied fresh each time. This gives your dentist a natural checkpoint to ask how your teeth feel before continuing. 5. Custom-fitted trays for take-home care. If you’re managing whitening at home, a tray built from an impression of your exact teeth keeps gel off your gums and prevents the uneven, “hot spot” whitening that causes pain in cheap trays. If you’re curious what this looks like in practice, our teeth whitening page walks through the in-office, take-home, and combination options we offer, including how we handle sensitivity for each. Best At-Home Support for Sensitive Teeth Whether you’re whitening at home or maintaining results after an in-office visit, a few habits make a real difference: How Long Does Sensitivity Last After Whitening? For most people, sensitivity from a single whitening session peaks within the first 24 hours and fades within 2 to 3 days. This is true whether you’re using a professional in-office treatment or a well-fitted take-home tray, as long as the sensitivity was a normal reaction and not a sign of an underlying issue like a crack or exposed root. If sensitivity is still noticeable after a week, or if it’s getting worse instead of better, that’s a signal to stop whitening

How to Clean a Dental Bridge: Step-by-Step Guide
Uncategorized

How to Clean a Dental Bridge: Step-by-Step Guide

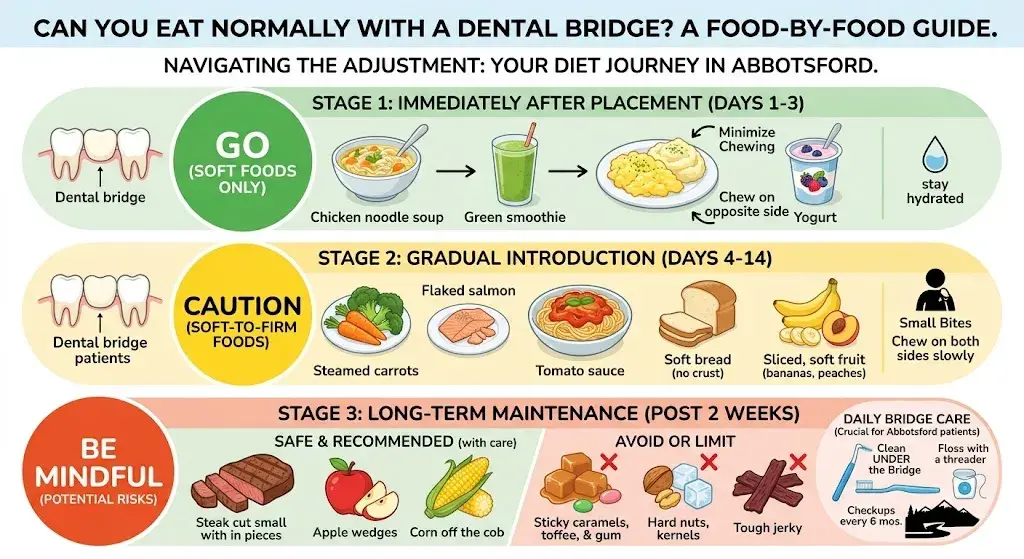
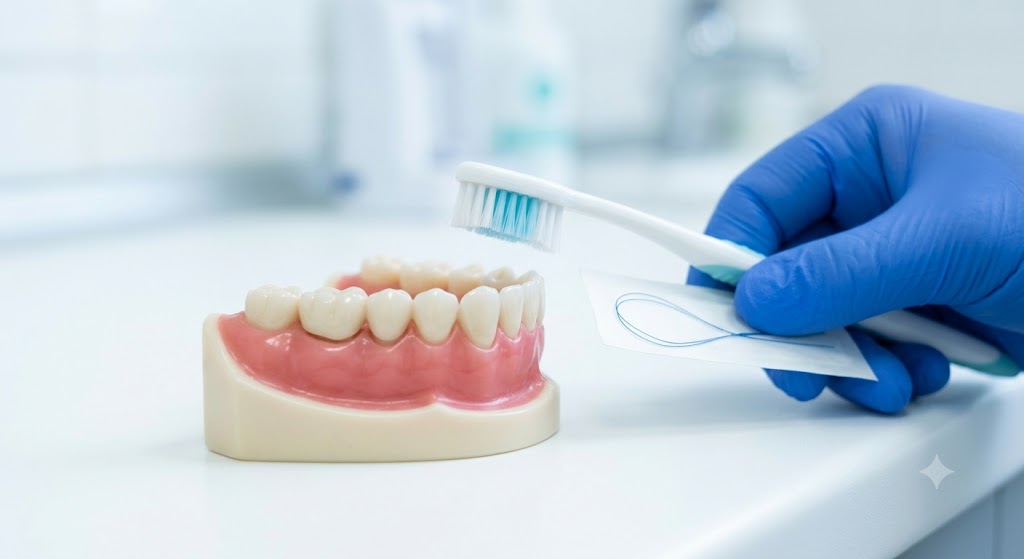
Quick answer: To clean a dental bridge, brush it twice a day with a soft-bristled brush and non-abrasive fluoride toothpaste, then use a floss threader, super floss, or interdental brush to clean underneath the pontic (the artificial tooth), where a normal toothbrush can’t reach. Finish with an antibacterial mouth rinse and see your dentist every six months so the fit and gumline can be checked professionally. A dental bridge restores your bite, your speech, and your smile — but it also creates a small gap between the pontic and your gum line that a regular toothbrush simply can’t reach. Left uncleaned, that gap becomes the perfect hiding spot for plaque and bacteria, and it’s the abutment teeth (the ones holding the bridge in place) that pay the price. The good news is that once you know the right tools and the right order to use them in, keeping a bridge clean only takes a few extra minutes a day. This guide walks Abbotsford patients through exactly how to clean a dental bridge, the tools worth having on hand, the mistakes that quietly shorten a bridge’s lifespan, and when it’s time to call your dentist instead of troubleshooting it yourself. Why Cleaning a Dental Bridge Properly Matters A bridge itself can’t get a cavity — but the natural teeth on either side of it (the abutment teeth) absolutely can. Those teeth are covered with crowns that anchor the bridge, and if plaque builds up along the edge of a crown, decay can start underneath it without much warning. Because a bridge is a fixed restoration, a cavity on an abutment tooth is a bigger problem than an ordinary cavity — depending on severity, it can mean the whole bridge needs to be remade. Poor cleaning around a bridge also raises the risk of gum inflammation at the point where the pontic sits against the gum tissue, which can develop into more serious gum disease if it isn’t addressed. If you’re already noticing puffy or bleeding gums around a bridge, it’s worth reading about periodontal treatment options in Abbotsford so it doesn’t progress further. The upside: patients who stay on top of daily cleaning and regular checkups are the ones who get the full 10 to 15 years — or longer — out of a dental bridge. Cleaning habits, more than the bridge material itself, are usually what determines how long it lasts. Tools You Need to Clean a Dental Bridge You don’t need anything exotic — most of these are available at any Abbotsford pharmacy — but a few of them are non-negotiable for reaching under the bridge: How to Clean a Dental Bridge: Step-by-Step Follow these steps once in the morning and once before bed for the best results: Morning vs. Night: Does It Matter? Both cleanings matter, but they serve slightly different purposes. Your morning routine clears away the bacteria that built up overnight and gets your mouth ready for the day. Your nighttime routine is the more important of the two — it removes the day’s food debris before hours of reduced saliva flow give bacteria a chance to multiply while you sleep. If you only have time for a thorough clean once a day, make it the evening one, but a quick brush-and-rinse in the morning still matters for fresh breath and comfort. Common Mistakes That Damage a Dental Bridge Even conscientious patients fall into a few avoidable habits: Signs Your Bridge Isn’t Being Cleaned Thoroughly Enough Keep an eye out for: If a bridge feels loose or has come away from an abutment tooth, that’s not something to wait out — same-day emergency dental care in Abbotsford can prevent the exposed tooth underneath from decaying further. How Often Should You Clean and Check a Dental Bridge? Clean it the same way you would your natural teeth: twice daily at minimum, with flossing or an interdental tool worked in at least once a day. On the professional side, most Abbotsford dentists recommend a checkup and cleaning every six months, though your dentist may suggest more frequent visits if you’re prone to plaque buildup or have had gum issues in the past. If you’re weighing a bridge against other tooth-replacement options, it’s also worth reading how bridges compare to dental implants, since implants and bridges have slightly different care routines. Frequently Asked Questions Can I use regular floss for a dental bridge? Not on its own. Regular floss can’t get under a fixed pontic because there’s no gap to pull it through from above. You’ll need a floss threader, super floss, or a water flosser to clean that area effectively. What happens if I don’t clean under my bridge? Plaque and food debris will build up against the abutment teeth, increasing the risk of decay under the supporting crowns and gum inflammation around the pontic — both of which can shorten the life of the bridge and, in some cases, require it to be replaced. Is a water flosser enough on its own? A water flosser is excellent for flushing out debris, but it works best alongside brushing and a floss threader or interdental brush rather than replacing them entirely. Combining tools gives the most thorough clean. How long does a dental bridge last with good care? With consistent cleaning and regular dental visits, most bridges last 10 to 15 years, and many last longer. You can read more detail on what affects longevity in our guide to how long dental bridges last. Can I eat normally with a dental bridge once it’s placed? Yes, once you’ve adjusted, which usually takes about a week. We cover this in more detail in what you need to know about eating with a dental bridge. Does cleaning a bridge cost extra at dental visits? Routine bridge care is included in a standard hygiene visit. If you’re curious about overall investment, our guide on dental bridge cost breaks down what affects pricing. The Bottom Line A dental bridge can comfortably last

Uncategorized

Types of Dental Fillings Explained: Composite vs. Amalgam vs. Ceramic

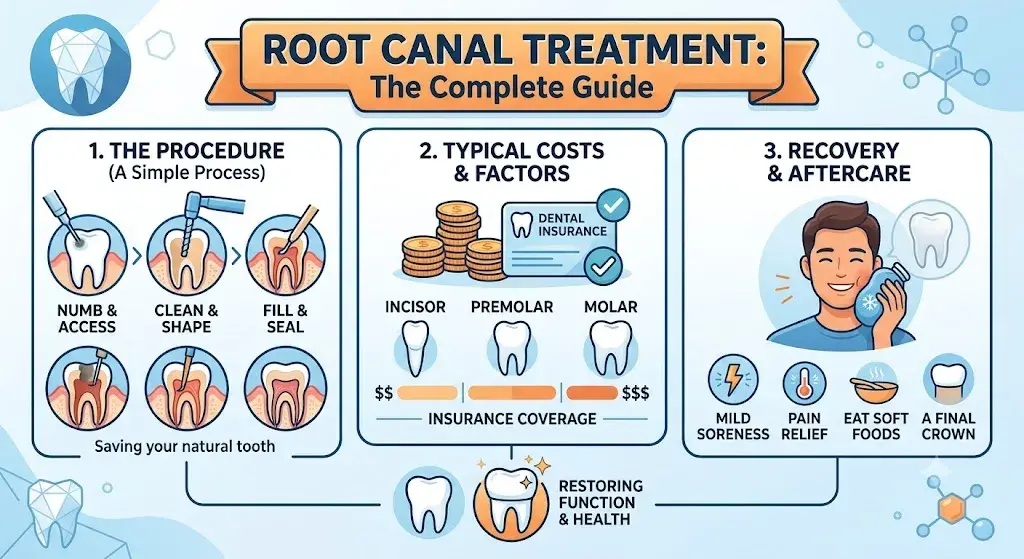
If your dentist just told you that you need a filling, the next question is almost always the same: which material should I choose? There are several types of dental fillings used in modern dentistry, and the right one depends on where the cavity is, how big it is, your budget, and how much you care about how it looks when you smile. In this guide, we break down the three most common dental fillings — composite, amalgam, and ceramic — so you can walk into your next appointment already knowing what to ask. What Is a Dental Filling, and and What Types of Dental Fillings Exist? A dental filling restores a tooth that has been damaged by decay, a crack, or wear. Once a dentist removes the decayed portion of the tooth, the resulting space needs to be filled with a durable material to restore its shape, strength, and function. Left untreated, a small cavity can progress into a much bigger problem, eventually requiring a root canal treatment or, in severe cases, tooth extraction. Catching decay early and choosing the right filling material is one of the simplest ways to protect a tooth for the long term. Direct vs. Indirect Fillings Before comparing materials, it helps to understand the two basic categories of fillings: With that foundation in place, let’s look at each material. Composite Fillings Composite resin fillings are a mixture of powdered glass and plastic resin, tinted to match your natural tooth shade. They are the most commonly requested filling today, largely because they’re virtually invisible once placed. How they’re placed: The dentist removes decay, applies a bonding agent, and layers the resin into the cavity, hardening each layer with a curing light before shaping and polishing the final result. Pros: Cons: Typical lifespan: 5–10 years with good oral hygiene. Best for: Small to medium cavities, front teeth, and patients who want a filling that disappears into their smile. Amalgam Fillings Amalgam, sometimes called a “silver filling,” has been used in dentistry for more than 150 years. It’s made from a blend of mercury, silver, tin, and copper, compressed into the cavity rather than bonded to it. Is amalgam safe? This is one of the most searched questions about fillings, and understandably so. Health Canada and the Canadian Dental Association both recognize amalgam as a safe, effective restorative material for most adults and children over six. The mercury is bound within a stable metal alloy, and the amount released during normal chewing is far below levels considered harmful. That said, some patients with a known metal sensitivity, or those who simply prefer a mercury-free mouth, opt for composite or ceramic instead — it’s a personal decision your dentist can help you think through. Pros: Cons: Typical lifespan: 10–15 years, often longer with excellent oral hygiene. Best for: Molars and other back teeth where strength matters more than appearance, and for patients looking for the most budget-friendly option. Ceramic Fillings Ceramic fillings — usually placed as inlays or onlays — are made from porcelain and are the most aesthetically advanced option available. Many practices, including newer CEREC or CAD/CAM-equipped clinics, can now design and mill a ceramic restoration in a single visit rather than the traditional two-appointment lab process. Pros: Cons: Typical lifespan: 10–15+ years. Best for: Larger cavities that still need a natural appearance, molars where a patient wants both strength and aesthetics, and as an alternative to a full dental crown when the tooth doesn’t need that much coverage. A Fourth Option: Glass Ionomer Fillings Composite, amalgam, and ceramic cover most adult restorations, but it’s worth knowing about a fourth material you may hear your dentist mention: glass ionomer. Made from a blend of acrylic and glass, this material releases fluoride over time, which helps protect the tooth from further decay. It isn’t as strong as the other three materials, so it’s generally reserved for small cavities, fillings below the gum line, or for children in our pediatric dentistry program who are at higher risk of new cavities. It’s rarely the right choice for a molar that needs to withstand years of chewing force, but it fills a useful niche where fluoride release matters more than long-term strength. Quick Comparison: Composite vs. Amalgam vs. Ceramic Feature Composite Amalgam Ceramic Appearance Tooth-coloured Silver-grey Tooth-coloured Average lifespan 5–10 years 10–15 years 10–15+ years Relative cost Moderate Lowest Highest Best location Front teeth, small-medium cavities Back teeth, large cavities Back teeth needing strength + aesthetics Visit time Single visit Single visit Single or two visits Stain resistance Moderate N/A (not tooth-coloured) High How to Choose the Right Filling for Your Tooth There’s no single “best” filling material — the right choice depends on a few factors your dentist will walk through with you: Our dentists at Medora Dental walk through each of these factors with you during your visit to our Abbotsford dental practice, so you’re never left guessing which option fits your situation. Signs You May Need a Filling Not every cavity announces itself with pain. Some of the more common signs worth booking an appointment for include: If you notice any of these and can’t get in right away, our emergency dentistry team can see you on short notice so decay doesn’t have extra time to spread. What Happens If You Delay Getting a Filling? It’s tempting to put off treatment for a small cavity, especially one that isn’t causing pain yet. But cavities don’t heal or stay the same size — they progress. A cavity that could have been treated with a simple composite filling today may require a root canal or crown a year from now if left untreated. If you’re already dealing with tooth pain that feels unbearable, don’t wait it out; the earlier a cavity is treated, the more conservative — and often more affordable — the treatment tends to be. Caring for Your Filling After Placement Regardless of which material you choose, a few habits will help your filling last as

When Can I Eat Solid Food After Tooth Extraction?
Uncategorized

When Can I Eat Solid Food After Tooth Extraction?

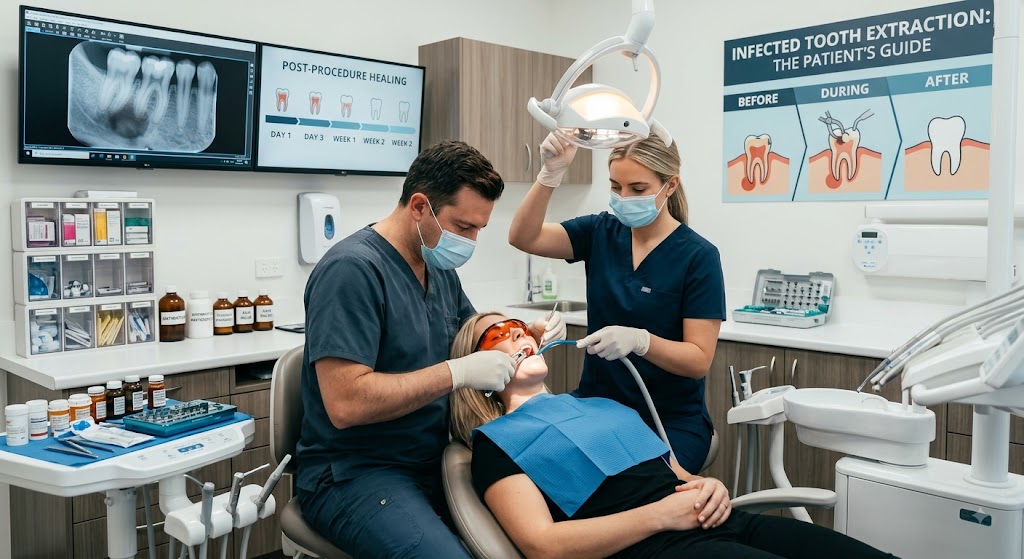
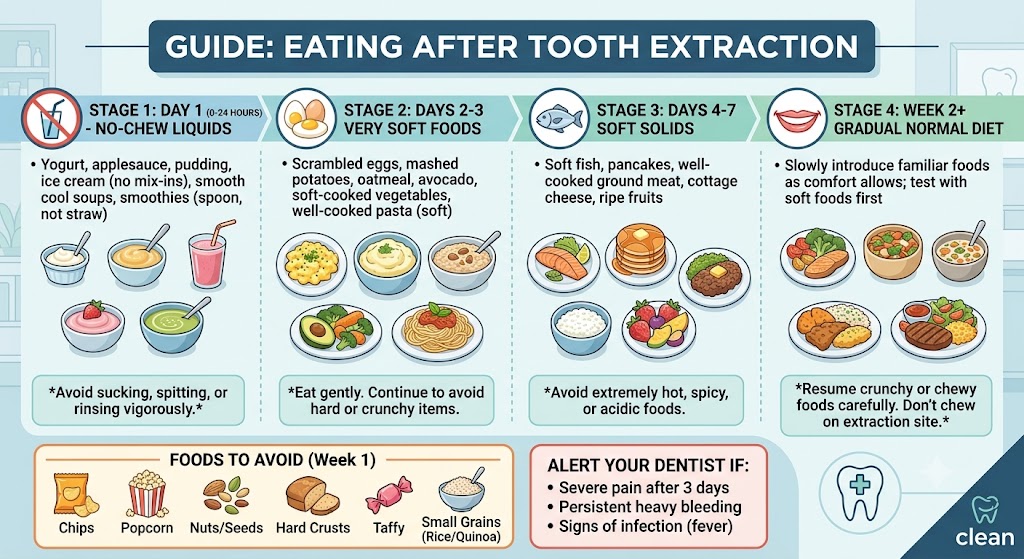
Quick answer: Most patients can start eating soft solid foods, such as mashed potatoes, scrambled eggs, or oatmeal, about 24 to 48 hours after a tooth extraction. Firmer solid foods are usually safe again after 5 to 7 days, once swelling has gone down and the socket has started to close. Wisdom teeth removal and surgical extractions can take a little longer, so always follow your dentist’s specific instructions. If you’ve just had a tooth pulled, chances are your stomach is already planning your next meal. It’s a completely normal question — and one our Abbotsford tooth extraction patients ask us almost every day. Eating the right foods at the right time protects the healing blood clot, lowers your risk of dry socket, and helps you get back to normal a lot faster. In this guide, we’ll walk you through exactly how long after tooth extraction you can eat, what to eat at every stage of recovery, which foods to avoid, and answers to the specific questions people search for most — like whether you can eat chocolate, donuts, or pasta after a tooth extraction. How Long After Tooth Extraction Can I Eat? The general rule dentists follow is simple: liquids and very soft foods for the first 24 hours, soft solids from day 2, and a gradual return to your normal diet by the end of week one. Here’s a quick breakdown of the healing timeline: Time After Extraction What You Can Eat First 2–3 hours Nothing until numbness wears off; sip water only 24 hours Cool, soft, blended foods (soups, smoothies without a straw, yogurt) 24–48 hours Soft solid foods (mashed potatoes, scrambled eggs, oatmeal) Day 3–7 Well-cooked pasta, soft-cooked vegetables, fish, ground meat After 1 week Most regular foods, avoiding anything very hard or crunchy near the site Recovery speed depends on a few factors: whether it was a simple or surgical extraction, how many teeth were removed, and how well you follow your dentist’s aftercare instructions. A single simple extraction generally heals faster than a surgical wisdom tooth removal, so timelines can shift a day or two in either direction. What Can I Eat 24 Hours After Tooth Extraction? During the first 24 hours, your top priority is protecting the blood clot that forms in the socket. This clot is what allows the gum tissue and bone underneath to heal properly, so anything that could dislodge it — chewing, sucking through a straw, or eating hot or crunchy food — needs to wait. Good options for the first day include: Keep food lukewarm or cool rather than hot, and chew only on the opposite side of your mouth if you need to chew at all. How Soon Can I Drink Water After Tooth Extraction? You can usually start sipping water as soon as the numbness fades, typically 1 to 2 hours after the procedure. Drink slowly and avoid using a straw for at least a week, since the suction can pull the clot loose and lead to a painful dry socket. Staying hydrated actually supports healing, so don’t be afraid to drink water regularly — just do it gently. What Can I Eat 2 Days After Tooth Extraction? By day two, most patients feel comfortable moving from liquids to soft, mushy solids. This is when food eaten after tooth extraction starts to look more like an actual meal again. Foods to eat after tooth extraction at this stage include: If you notice increased pain, swelling, or bleeding when you introduce these foods, scale back to liquids for another day and check in with your dentist. Foods to Eat After Tooth Extraction: Days 3–7 Around day three, the socket begins closing over and discomfort usually starts easing off. This is when you can safely widen your list of things to eat after tooth extraction to include foods that require a little more chewing, as long as you avoid the extraction site itself. Good choices for this stage include: This is also a good time to slowly reintroduce more variety while keeping portions small and chewing carefully. If you had a more complex procedure, our guide on how soon you can eat after a tooth extraction breaks down aftercare in more detail. When Can You Eat Solid Foods After Wisdom Teeth Removal? Wisdom teeth extractions, especially surgical removals of impacted teeth, tend to need a slightly longer runway than a routine extraction. Swelling is often more noticeable, and the extraction sites are further back in the mouth, making chewing trickier. For wisdom teeth solid food timing, plan on: Because wisdom tooth sockets are deeper, food particles can get trapped more easily, so gentle salt water rinses after 24 hours are especially important. Our team has more on this in our post about how long recovery from wisdom tooth removal really takes, and why skipping the salt water rinse can slow things down. If you’re weighing your options before the procedure, our wisdom teeth removal in Abbotsford page covers what to expect from start to finish. Foods to Avoid After Dental Surgery Just as important as knowing what to eat is knowing what not to eat. The wrong food after dental surgery can dislodge the clot, irritate the socket, or get lodged in the wound and cause infection. Steer clear of: Avoiding these for at least a week (longer for wisdom teeth) significantly lowers your risk of complications like dry socket or infection. Answering Your Specific Food Questions Can You Eat Chocolate After Tooth Extraction? Smooth, melt-in-your-mouth chocolate, like a plain chocolate pudding or a small piece of soft milk chocolate, is generally fine after the first 24 to 48 hours since it requires very little chewing. However, chocolate bars with nuts, caramel, crisped rice, or toffee should be avoided for at least a week, as the crunchy or sticky pieces can disturb the healing socket. Can I Eat Donuts After Tooth Extraction? It’s best to hold off on donuts for the first few days. Most donuts are

Uncategorized

How to Choose a Pediatric Dentist in Abbotsford: A Parent’s Checklist

Choosing the right pediatric dentist shapes how your child feels about dental care for the rest of their life. The best pediatric dentist in Abbotsford should have specialized training in child dental care, a genuinely kid-friendly office, gentle communication with young patients, and a track record of making anxious kids feel comfortable — not just a general dentist willing to “see kids too.” If your child’s first tooth just came in, or you’re simply not happy with your current provider, here’s exactly what to look for before you book. Pediatric Dentist vs. Family Dentist: What’s the Difference? Many Abbotsford parents assume any dentist can treat a child, and technically that’s true — but it’s not always the best fit. A pediatric dentist completes two to three additional years of specialized training after dental school, focused entirely on child behavior, growth and development, and treating anxious or very young patients. A family dentist treats patients of all ages and can absolutely provide excellent care for children, especially once kids are a bit older and more cooperative in the chair. At Medora Dental, our approach blends the best of both: a dedicated, child-focused pediatric program within a full family dental practice in Abbotsford — so your child gets specialized care, and your whole family can stay at one clinic as they grow. What to Look For in a Pediatric Dentist Use this checklist when evaluating any pediatric dental office in Abbotsford: 1. Specialized Training and Experience Ask whether the dentist has completed pediatric-specific training or has extensive experience treating young children. Comfort with toddlers, kids with sensory sensitivities, and nervous first-timers isn’t something every dentist develops. 2. A Genuinely Kid-Friendly Office This goes beyond a few toys in the waiting room. Look for: 3. Clear, Age-Appropriate Communication A good pediatric dentist explains procedures using simple, non-scary language — think “tooth counting” instead of “exam,” or “sparkly juice” instead of “fluoride.” This single habit makes a massive difference in whether a child dreads or looks forward to their next visit. 4. A Genuine First-Visit Focus on Comfort, Not Treatment The Canadian Dental Association recommends a first visit by age one or within six months of the first tooth. A strong pediatric dentist treats that first appointment as a trust-building exercise, not a rushed exam — often with little to no actual treatment involved. 5. Sedation and Comfort Options for Anxious Kids Even in a great office, some kids need extra support. Ask if the practice offers options like nitrous oxide for children who are especially anxious or need more involved treatment. Our sedation dentistry options are available for exactly these situations. 6. Transparent Pricing and Insurance Support A trustworthy practice will walk you through costs and insurance coverage before treatment begins — not after. 7. Same-Week Availability for Dental Emergencies Kids fall, chip teeth, and develop sudden toothaches at the worst possible times. Confirm the practice offers emergency dental care with fast turnaround, not a multi-week wait. Questions to Ask Before You Book Bring these questions to your first call or consultation: If a practice can’t answer these clearly and patiently, that’s worth noting. Red Flags to Watch For When Should My Child See a Pediatric Dentist? Most children can start with a pediatric dentist as early as their first birthday or within six months of their first tooth erupting, whichever comes first. This early start allows the dentist to monitor development, catch early signs of decay, and — just as importantly — help your child build comfort with the dental chair before any real treatment is needed. If your child already has a cavity, our guide on what happens if your child needs a filling walks through exactly what to expect at that first treatment visit. And if you’ve been told your young child has multiple cavities, our post on whether it’s normal for a 4-year-old to have cavities covers why this is more common than most parents realize. Why Abbotsford Families Choose Medora Dental for Pediatric Care At Medora Dental, Dr. Ash and our Abbotsford team have built a pediatric program around comfort first, treatment second. Families consistently tell us their kids ask to go back to the dentist — a sign that early, positive experiences are doing exactly what they’re supposed to do. If you’re comparing pediatric dental offices across Abbotsford and the Fraser Valley, you can also see what sets our overall practice apart on our best dentist in Abbotsford page. Frequently Asked Questions What is the difference between a pediatric dentist and a family dentist? A pediatric dentist completes additional specialized training in child development and behavior management, focusing exclusively on kids. A family dentist treats all ages and can be a great option once children are a bit older and more comfortable in the chair. What age should my child start seeing a pediatric dentist? By their first birthday, or within six months of their first tooth coming in, according to Canadian Dental Association guidelines. How do I know if a pediatric dentist is a good fit for my child? Look for specialized training, a genuinely kid-friendly office, age-appropriate communication, and a first visit that prioritizes comfort over treatment. Trust your child’s reaction after the appointment as much as your own impression. Is a pediatric dentist necessary, or can my family dentist treat my child? It depends on your child’s age, temperament, and needs. Many family dentists provide excellent care for older, cooperative kids, but a pediatric-focused practice is often a better fit for toddlers, anxious children, or kids needing more complex treatment. What should I do if my child is scared of the dentist? Look for a practice experienced in easing dental anxiety, one that uses simple language, allows comfort items, and offers sedation options like nitrous oxide when needed. Book a Pediatric Dental Visit in Abbotsford Choosing the right pediatric dentist sets the tone for your child’s relationship with dental care for years to come. If you’re ready for a gentle, experienced team in

How Long Do Dental Bridges Last?
Uncategorized

How Long Do Dental Bridges Last? A Complete Guide from Abbotsford Dentists

Missing teeth affect more than your smile. They change how you chew, how you speak, and even how your remaining teeth sit in your jaw over time. Among the most trusted solutions for replacing missing teeth, dental bridges remain a popular, affordable, and reliable option for patients across the Fraser Valley. But if you’re considering dental bridges in Abbotsford, you’ve probably asked yourself one key question: how long do dental bridges last, and is the investment worth it? This guide walks through everything you need to know about dental bridge lifespan, the factors that affect durability, how to properly maintain your bridge, warning signs that replacement may be needed, and expert advice on dental bridges from Abbotsford dentists who see these restorations succeed — and occasionally fail — every day. What Is a Dental Bridge? A dental bridge is a fixed dental restoration used to replace one or more missing teeth by literally “bridging” the gap between healthy teeth or dental implants. Unlike removable dentures, a fixed dental bridge is cemented or bonded into place, so you don’t take it in and out. It restores your ability to chew properly, keeps your bite aligned, and prevents neighbouring teeth from shifting into the empty space left by a missing tooth. A typical bridge is made up of three main parts: Bridges are custom-made from materials like porcelain, ceramic, zirconia, or a combination of porcelain fused to metal, depending on the location of the missing tooth, your bite strength, and your aesthetic preferences. Types of Dental Bridges Not every bridge is built the same way. Understanding the different types of dental bridges helps explain why some restorations last longer than others. Your dentist will recommend the right type based on your oral health, the number of missing teeth, and your long-term goals for restorative dental care. How Long Do Dental Bridges Last? This is the question nearly every patient asks before committing to treatment, and it’s an important one. On average, a well-made and properly cared-for dental bridge lasts between 10 and 15 years. However, this is a conservative estimate — many patients enjoy their bridge for 20 years or more when they follow good oral hygiene habits and attend regular dental checkups. So, can a dental bridge last 20 years? Yes, absolutely. The average lifespan of a dental bridge depends heavily on the material used, the skill of the dentist who placed it, the health of the supporting teeth, and how diligently the patient maintains it afterward. Implant-supported bridges, in particular, tend to have a longer permanent dental bridge lifespan because they don’t rely on the health of adjacent natural teeth, which can weaken or decay over time. It’s worth noting that “permanent” in dentistry doesn’t always mean “forever.” Even the most durable dental bridge is a mechanical restoration subject to wear, and like any dental work, it will eventually need attention, adjustment, or replacement. Understanding this upfront helps set realistic expectations and encourages the kind of preventive care that extends a bridge’s working life. What Affects the Lifespan of a Dental Bridge? Several variables determine dental bridge durability, and being aware of them can help you get the most value out of your restoration. 1. Oral Hygiene Habits This is the single biggest factor within your control. Because a bridge relies on the health of the abutment teeth and the gum tissue beneath the pontic, any buildup of plaque or bacteria in these areas can lead to decay or gum disease, undermining the entire structure — even though the bridge itself is artificial and can’t decay. 2. Material Quality Zirconia and high-quality porcelain bridges tend to outperform older materials in both strength and appearance. The choice of material affects how well the bridge resists chipping, cracking, and staining over time. 3. Bite Force and Grinding Patients who grind or clench their teeth (a condition called bruxism) place additional stress on a bridge, which can shorten its functional life. A nightguard is often recommended to protect the restoration. 4. Quality of the Original Fit A bridge that’s precisely fitted by an experienced dentist will distribute bite forces evenly and seal tightly against the gumline, reducing the risk of bacteria seeping underneath. Poorly fitted bridges are far more prone to early failure. 5. Supporting Tooth Health Since a traditional bridge depends on the strength of the abutment teeth, any decay, gum recession, or bone loss affecting those teeth can compromise the whole restoration, regardless of how well the bridge itself was made. 6. Diet and Lifestyle Frequent chewing of hard foods (ice, hard candies, unpopped popcorn kernels) or habits like nail-biting can chip or crack a bridge over time. Smoking also increases the risk of gum disease around the abutment teeth. Tips to Make a Dental Bridge Last Longer Extending your dental bridge’s lifespan comes down to consistent, thoughtful care. Here’s what dentists recommend: Following these habits consistently is one of the most reliable ways to protect your investment and extend the life of your restoration well beyond the average. How to Clean and Maintain a Dental Bridge Proper dental bridge maintenance isn’t complicated, but it does require a slightly different approach than caring for natural teeth alone. Because the pontic sits above the gum tissue without a root, food particles and bacteria can accumulate underneath it if not cleaned properly. Here’s a simple daily routine for caring for a dental bridge: This routine, paired with a healthy diet and regular checkups, forms the foundation of long-term oral hygiene for dental bridges. Signs Your Dental Bridge Needs Replacement Even with excellent care, bridges don’t last forever. Recognizing the warning signs early can prevent more serious dental bridge problems down the road. Contact your dentist if you notice: If you notice any of these signs, it’s best not to wait. Left untreated, underlying decay or infection can spread to the supporting teeth and complicate future dental bridge replacement. Common Dental Bridge Problems While bridges are generally reliable, a few issues tend to

Foods to Eat After Tooth Extraction: Your Day-by-Day Guide to a Faster, More Comfortable Recovery
Uncategorized

Foods to Eat After Tooth Extraction: Your Day-by-Day Guide to a Faster, More Comfortable Recovery

Having a tooth removed is a routine dental procedure, but your recovery doesn’t end when you leave the dental office. One of the biggest factors that influences how quickly and comfortably you heal is what you eat after tooth extraction. Choosing the right foods can help protect the blood clot that forms in the extraction site, reduce discomfort, and provide your body with the nutrients it needs to repair gum tissue. On the other hand, eating hard, crunchy, or spicy foods too soon can irritate the surgical area, delay healing, and increase the risk of complications such as dry socket. Many patients ask questions like: The answers depend on where you are in the healing process. During the first 24 hours, your mouth needs gentle, easy-to-swallow foods that won’t disturb the blood clot. Over the next several days, you can gradually introduce more nutritious soft foods as your gums begin to heal. This guide explains exactly what to eat after tooth extraction, which foods support faster healing, what to avoid, and how your diet should change from day one through the following weeks. Whether you’ve had a simple extraction or wisdom tooth removal, these practical recommendations can help make your recovery smoother and more comfortable. What Are the Best Foods to Eat After Tooth Extraction? If you’re looking for a quick overview, these are some of the best foods to eat after tooth extraction: First 24 Hours Days 2–3 Days 4–7 Plain yogurt Scrambled eggs Soft pasta Applesauce Oatmeal Flaky fish Mashed potatoes Mashed sweet potatoes Well-cooked rice Smooth soups Cottage cheese Steamed vegetables Protein smoothies (no straw) Mashed avocado Tender chicken Pudding Silken tofu Soft pancakes Quick Recovery Tips ✔ Eat soft, cool, or lukewarm foods. ✔ Drink plenty of water. ✔ Avoid using a straw. ✔ Chew on the opposite side of your mouth. ✔ Stay away from crunchy, spicy, or sticky foods until your dentist says it’s safe. Why Your Diet Matters After Tooth Extraction After a tooth is removed, your body immediately starts repairing the extraction site. One of the first steps in this process is the formation of a blood clot, which protects the underlying bone and nerves while new tissue develops. This blood clot acts like a natural bandage. If it becomes dislodged too early, the bone and nerves underneath can become exposed, leading to a painful condition called dry socket. Your diet plays an important role in protecting this clot while providing the nutrients your body needs for healing. A healthy tooth extraction recovery diet helps: While soft foods are important, nutrition matters just as much. Your body needs adequate protein, vitamins, minerals, and fluids to repair damaged tissues efficiently. Dentist’s Tip Many patients assume they can return to normal eating as soon as the numbness wears off or the pain improves. In reality, the extraction site continues healing beneath the surface for days or even weeks. Even if you feel better, introducing crunchy or hard foods too early can slow healing or irritate the area. Understanding the Healing Process Knowing how your mouth heals makes it easier to understand why your diet changes over time. First 24 Hours The blood clot forms immediately after the extraction and is at its most vulnerable during the first day. During this period: Choose foods that require little or no chewing and avoid anything that creates suction or pressure inside your mouth. Days 2–3 Swelling often reaches its peak before gradually improving. The blood clot becomes more stable, but the gums remain sensitive. This is a good time to introduce slightly thicker, protein-rich foods while continuing to avoid anything hard or crunchy. Days 4–7 Your gums begin producing new tissue around the extraction site. Most people notice less discomfort and can slowly expand their diet with additional soft meals. Continue chewing on the opposite side whenever possible. Week 2 and Beyond By the second week, many patients can begin returning to their normal eating habits, although complete healing beneath the gums continues for several weeks. If your extraction was more complex—such as an impacted wisdom tooth—you may need to follow a soft-food diet for longer. Always follow your dentist’s specific instructions. Foods to Eat During the First 24 Hours The first day is the most important stage of recovery. The foods you choose should protect the extraction site while providing gentle nutrition and hydration. 1. Plain or Greek Yogurt Yogurt is one of the easiest soft foods after tooth extraction because it requires no chewing and has a cool, smooth texture that can feel soothing on tender gums. Greek yogurt offers additional protein, making it an excellent choice for tissue repair. Why it’s beneficial Choose: Plain or low-sugar yogurt without fruit chunks, seeds, or granola. 2. Applesauce Applesauce is gentle on sensitive gums and provides natural carbohydrates for energy. It also contains vitamin C and antioxidants that contribute to normal healing, making it a practical option during the first day. Choose smooth applesauce without fruit pieces. 3. Mashed Potatoes Mashed potatoes are filling, comforting, and easy to eat. They provide carbohydrates that help maintain your energy while your body focuses on healing. For a healthier option, consider adding plain Greek yogurt instead of extra butter or cream. Tip: Serve them warm or lukewarm rather than hot. 4. Smooth Soups Blended soups provide hydration while supplying vitamins and minerals. Good choices include: Avoid soups with large vegetable pieces, noodles, or crunchy toppings. Allow hot soups to cool before eating. 5. Protein Smoothies (Without a Straw) Protein is one of the most important nutrients for wound healing. A homemade smoothie can provide protein, vitamins, and calories when chewing is uncomfortable. A simple recovery smoothie might include: Important: Drink directly from a cup. Using a straw creates suction that may dislodge the healing blood clot. 6. Pudding Pudding is a soft dessert that can make eating easier when your mouth feels sore. While it’s not a significant source of nutrients, it can add variety to your meals during

How Much Does a Dental Bridge Cost in 2026? Complete Price Guide
Uncategorized

How Much Does a Dental Bridge Cost in 2026? Complete Price Guide

If you’re missing one or more teeth, you’ve probably already searched “how much does a dental bridge cost” and found a dozen different numbers. That’s because the cost of a dental bridge depends on the type of bridge, the material used, your location, and whether you have dental insurance. This guide breaks down everything you need to know about dental bridge cost in 2026, from national averages to financing options, so you can budget accurately and avoid surprise bills. Quick Answer: Dental Bridge Cost in 2026 On average, a dental bridge cost ranges from $1,500 to $5,500 per tooth gap, depending on the type of bridge and materials used. A traditional three-unit bridge typically costs $2,000 to $5,000, while an implant-supported bridge can run $5,000 to $15,000 or more. Most patients pay somewhere between $3,000 and $4,500 for a standard bridge before insurance. If you’re wondering how much does a dental bridge cost without insurance, expect to pay full price, which usually falls between $2,000 and $5,000 for a three-unit bridge. With insurance, many plans cover 40-50% of the cost, bringing your out-of-pocket expense down significantly. Signs You May Need a Dental Bridge Before diving deeper into dental bridge cost, it helps to know when a bridge is actually the right solution. Common signs include a visible gap from a missing tooth, difficulty chewing on one side of your mouth, shifting or tilting of neighboring teeth, changes in speech clarity, or a sunken appearance in your cheeks near the gap. If you’re experiencing any of these, a consultation with your dentist can confirm whether a bridge, implant, or partial denture is the best fit for your situation and budget. What Is a Dental Bridge? A dental bridge is a fixed prosthetic device that “bridges” the gap created by one or more missing teeth. It’s anchored to the natural teeth or implants on either side of the gap, using crowns to hold a false tooth (called a pontic) in place. Bridges restore your ability to chew, speak clearly, and maintain your facial structure, while also preventing surrounding teeth from shifting out of position. Understanding what goes into a bridge helps explain why the dental bridge price varies so much from patient to patient. Material, complexity, and the number of teeth involved all influence the final number. Average Cost of Dental Bridge by Type The dental bridge cost varies significantly based on which type of bridge your dentist recommends. Here’s a breakdown of the main types of dental bridges cost you should expect in 2026. Traditional Dental Bridge Cost Traditional bridges are the most common option, using dental crowns on both sides of the gap to support the pontic in the middle. A traditional dental bridge cost breakdown typically looks like this: Cantilever Dental Bridge Cost A cantilever bridge is used when there’s only one natural tooth next to the gap, rather than teeth on both sides. Because it requires a slightly different technique and less material, cantilever dental bridge cost generally ranges from $2,000 to $4,500, similar to a traditional bridge, though your dentist may charge a bit less since fewer anchor teeth are involved. Maryland Dental Bridge Cost A Maryland bridge uses a metal or porcelain framework bonded to the back of adjacent teeth instead of full crowns, making it a more conservative option. Maryland dental bridge cost typically falls between $1,500 and $2,500, making it one of the more affordable dental bridge choices, though it’s generally recommended only for front teeth due to lower bite strength. Implant Supported Bridge Cost An implant supported bridge cost is higher because it involves surgically placed titanium posts instead of relying on natural teeth. This option typically costs $5,000 to $15,000, depending on how many implants and pontics are needed. While the upfront cost is significant, implant-supported bridges tend to last longer and don’t require altering healthy adjacent teeth. Dental Bridge Cost Per Tooth Dentists usually price bridges per unit rather than as a flat fee, since each crown and pontic counts as one unit. A single crown unit generally costs $800 to $1,500. This makes it easier to calculate dental bridge cost per tooth 2026 pricing based on how many units your case requires. 3 Tooth Dental Bridge Cost The most common configuration is a 3 unit dental bridge cost, which covers one missing tooth supported by two crowns on either side. So how much does a 3 unit dental bridge cost? Expect to pay: A 3 tooth dental bridge cost can climb higher in major metropolitan areas or when additional procedures like root canals or bone grafting are needed beforehand. Dental Bridge Cost With Insurance vs Without Insurance Dental Bridge Cost With Insurance Most dental insurance plans classify bridges as a “major” procedure, meaning dental bridge cost with insurance is typically covered at 40-50% after you meet your deductible. If your plan has an annual maximum of $1,000 to $2,000, that cap can significantly limit how much you actually save, especially on a multi-unit bridge. Dental Bridge Cost Without Insurance Paying dental bridge cost without insurance means covering the full retail price, which is why many patients without coverage look into dental schools, payment plans, or discount dental membership programs to reduce expenses. Without insurance, a standard three-unit bridge will usually cost $2,000 to $5,000 out of pocket. Does Dental Insurance Cover Bridges? Yes, most standard dental insurance plans offer some dental bridge insurance coverage, but the details vary widely between providers. Here’s what typically affects your coverage: Always request a pre-treatment estimate from your insurer before committing, so there are no surprises when the bill arrives. Best Dental Insurance for Bridges 2026 When comparing plans, look beyond the monthly premium. The best dental insurance for bridges 2026 typically features a low or waived waiting period for major work, a reasonable annual maximum of $2,000 or higher, and in-network dentists who offer bridges at negotiated rates. PPO plans generally offer more flexibility for major dental work like bridges compared to

How Much Does It Cost to Whiten Teeth in Abbotsford?
Uncategorized

How Much Does It Cost to Whiten Teeth in Abbotsford?

If you’ve been searching “how much does it cost to whiten teeth,” you’ve probably noticed the answers online are all over the place — anywhere from $20 drugstore strips to $1,000+ dental office treatments. That’s not a typo, and it’s not misinformation. Teeth whitening genuinely does span that entire price range, and the right answer for you depends on factors most generic articles never explain clearly. This guide breaks down exactly what affects teeth whitening cost in Abbotsford, what you actually get at each price point, and how to avoid overpaying for results that don’t last. It’s written using current 2026 pricing information from Fraser Valley dental practices, so you’re working with real numbers, not guesses. Quick Answer: Average Teeth Whitening Cost in Abbotsford For readers who want the number first: professional in-office teeth whitening in Abbotsford typically costs between $300 and $700 per session, while dentist-supervised take-home custom tray kits run $250 to $450. Over-the-counter options like strips and pens cost $20 to $80 but deliver noticeably weaker, less consistent results. Here’s a quick breakdown: Whitening Option Average Cost Results Last In-office professional whitening $300–$700 1–3 years Dentist-supervised take-home trays $250–$450 6 months–2 years Combination (in-office + take-home top-up kit) $450–$800 2–3 years Over-the-counter strips/pens $20–$80 2–4 months Whitening toothpaste $10–$25 Surface stains only These figures reflect typical Fraser Valley and BC dental pricing as of 2026. Now let’s look at why the range is so wide, because the “why” matters more than the number. Why Teeth Whitening Cost Varies So Much Teeth whitening isn’t a one-size-fits-all service, and the price differences aren’t random. Several concrete factors determine what you’ll actually pay. 1. Type of Whitening Method The single biggest driver of cost is whether you choose in-office treatment, take-home trays, or store-bought products. In-office whitening uses professional-grade hydrogen peroxide gel (typically 25–40% concentration) activated under controlled conditions, which is why it costs more but also works faster — often in a single 60–90 minute visit. Take-home trays use a lower-concentration gel (10–22% carbamide peroxide) applied over one to two weeks, which costs less per session but requires more of your time. 2. Severity and Type of Staining Not all stains respond the same way. Surface-level extrinsic stains from coffee, tea, red wine, or smoking typically lighten faster and cost less to treat than intrinsic stains that sit deeper in the tooth structure — the kind caused by certain medications (like tetracycline), fluorosis, or aging. If your dentist identifies intrinsic staining during your consultation, they may recommend a longer treatment plan or alternative cosmetic options, which affects the total cost. 3. Number of Sessions Needed Some patients see dramatic results in one visit. Others — particularly those with naturally darker enamel or long-term staining — need two or three sessions to reach their desired shade. Dental offices in Abbotsford often price single sessions and multi-session packages differently, so it’s worth asking for a package quote if your dentist expects you’ll need more than one visit. 4. Additional Dental Work Required If you have cavities, gum disease, or worn enamel, your dentist will likely recommend addressing those issues before whitening. This isn’t upselling — untreated dental problems can make whitening gel irritate exposed dentin or gum tissue, causing unnecessary sensitivity or pain. Addressing this first protects both your comfort and your results, but it does mean your total cost may include preliminary treatment. 5. Clinic Location and Technology Practices using newer LED-accelerated whitening systems or offering same-day results generally charge more than clinics using older methods. Abbotsford’s proximity to Vancouver also plays a role — clinics in higher-cost areas of the Fraser Valley may price slightly above smaller, independent practices. In-Office Professional Whitening: What You’re Paying For When people ask how much it costs to whiten teeth professionally, they’re often surprised by the price until they understand what’s included. A typical in-office appointment involves: This is why in-office whitening costs more — you’re paying for a controlled clinical environment, professional-grade materials, and immediate, predictable results, plus the expertise of a licensed dentist who can catch problems before they start. For patients with sensitive teeth or a special event coming up, this predictability is often worth the higher price. Take-Home Custom Tray Kits: The Middle-Ground Option Custom take-home kits from a dentist sit between professional treatment and drugstore products in both cost and results. Your dentist takes an impression of your teeth, creates custom-fitted trays (unlike the generic one-size trays sold in stores), and provides professional-grade gel with clear instructions. This option appeals to people who want dentist-supervised results without the time commitment of an in-office visit, or who want a maintenance kit to use periodically after an initial in-office treatment. Because the trays are custom-fitted, the gel stays in contact with your teeth more evenly than store-bought trays, reducing both waste and gum irritation. Why Over-the-Counter Products Are Cheaper — But Not Necessarily a Better Deal Whitening strips and pens are inexpensive and convenient, but the lower price reflects real limitations, not just lower overhead. Store-bought products use significantly weaker peroxide concentrations for safety reasons, since there’s no dentist present to monitor your gums or catch sensitivity issues early. Results are typically less even, fade faster, and can’t correct deeper or intrinsic stains at all. If your budget only allows for over-the-counter whitening, that’s a completely valid choice — just set realistic expectations about how long results will last and how dramatic the change will be. Many people use OTC products for touch-ups between professional sessions, which is often the smartest way to combine cost savings with lasting results. Is Teeth Whitening Covered by Insurance? This is one of the most common questions we hear, and the answer is straightforward: teeth whitening is considered a cosmetic procedure, and it is not covered by most dental insurance plans in Canada, including provincial and private plans. Insurance typically covers whitening only in rare cases where discoloration results directly from an injury or a covered medical treatment (such as certain root canal

Uncategorized

Why Is My Toothache Worse at Night? (And How to Get Relief)

A toothache that flares up the moment you lie down at night is not your imagination. There are real, science-backed reasons why tooth pain gets worse at night — and knowing them can help you find faster relief. Whether it is a dull throb or a sharp, stabbing sensation that keeps you staring at the ceiling, this guide explains exactly what is happening and what you can do about it right now. Why Does Tooth Pain Get Worse at Night? Most people notice their toothache feels manageable during the day but becomes unbearable the moment they try to sleep. Here are the main reasons why: 1. Increased Blood Flow to Your Head When You Lie Down When you are upright during the day, gravity helps keep blood flow evenly distributed throughout your body. The moment you lie down flat, blood pressure in your head increases. This extra blood flow puts additional pressure on the already-sensitive nerves inside your tooth, which intensifies the pain significantly. This is the number one reason toothache gets worse at night. 2. No Distractions at Night During the day, your brain is busy — work, conversations, screens, movement. These distractions naturally reduce your perception of pain. At night, when the house is quiet and there is nothing to focus on, your brain has nothing competing with the pain signal. The toothache that felt like a “5 out of 10” during the day can feel like an “8 or 9” at midnight simply because your full attention is on it. 3. Teeth Grinding (Bruxism) During Sleep Many people grind or clench their teeth at night without even knowing it. This unconscious habit — called bruxism — puts enormous pressure on already-weakened or decayed teeth. If you wake up with jaw soreness and a toothache, grinding could be the trigger making your pain worse at night. 4. Recent Dental Work or Sensitivity If you have recently had a filling, crown, or extraction, the area may be more sensitive at night when your body is in a relaxed state and inflammation is less suppressed. Post-procedure sensitivity often feels more intense at night for the same blood-flow reasons mentioned above. 5. Underlying Infection or Abscess A dental abscess — a pocket of infection at the root of a tooth — causes a persistent, throbbing pain that almost always feels worse at night. Infections tend to worsen when your immune system is less active and when you are horizontal. If your toothache is accompanied by swelling, fever, or a bad taste in your mouth, you may have an abscess and need urgent dental care. 6. Acid Reflux and Nighttime Habits Acid reflux (GERD) can quietly erode tooth enamel over time, making your teeth more sensitive and prone to nighttime pain. Similarly, eating sugary or acidic foods before bed without brushing properly can trigger or worsen a toothache overnight. How to Get Relief from Toothache at Night You need to see a dentist to treat the underlying cause — but here is how to get through the night: 1. Elevate Your Head While Sleeping This is the simplest and most effective immediate fix. Use an extra pillow to prop your head up at a 30–45 degree angle. Elevating your head reduces blood pressure in the head area, which directly reduces the throbbing intensity of the tooth pain. This one change alone can make a significant difference. 2. Take an Over-the-Counter Pain Reliever 3. Apply a Cold Compress Wrap an ice pack in a cloth and apply it to the outside of your cheek near the painful tooth for 15–20 minutes on and 15–20 minutes off. Cold reduces swelling and numbs the nerve signals temporarily. Never apply ice directly to the skin. Important: Avoid heat on a toothache at night. Heat increases blood flow to the area and can make the pain significantly worse. 4. Use Clove Oil Clove oil contains eugenol, a natural anesthetic compound. Dab a tiny amount on a cotton ball and gently press it against the affected tooth and gum for 1–2 minutes. It provides fast, temporary numbing relief. Use sparingly — too much can irritate the gum tissue. 5. Rinse with Warm Salt Water Mix half a teaspoon of salt into a glass of warm water and swish gently for 30 seconds before spitting. Salt water reduces oral inflammation, clears bacteria around the tooth, and can ease the pain enough to help you rest. Repeat every few hours if needed. 6. Apply an OTC Dental Gel (Benzocaine) Products like Orajel or Anbesol contain benzocaine, a topical anesthetic that you apply directly to the gum around the sore tooth. It numbs the area quickly and can provide 20–30 minutes of relief — just enough to help you fall asleep. 7. Avoid Triggers Before Bed 8. Keep Your Mind Occupied If the pain is manageable but distracting, try light podcasts, sleep meditations, or white noise to give your brain something to focus on other than the pain. While this is not a cure, it can help reduce the psychological amplification of nighttime pain. When to Seek Emergency Dental Care Home remedies are temporary. You should contact an emergency dentist or go to urgent care immediately if: A dental abscess, in particular, is a medical emergency. Left untreated, the infection can spread beyond the tooth into the jaw, neck, and in serious cases, the bloodstream. What Causes Toothache in the First Place? Understanding the root cause of your tooth pain will help you get the right treatment from your dentist. Common causes include: Cause Key Symptom Tooth decay (cavity) Persistent dull ache, pain with sweets Cracked tooth Sharp pain when biting or chewing Gum disease Soreness, bleeding gums, sensitivity Dental abscess Throbbing pain, swelling, fever Exposed tooth root Sensitivity to hot, cold, sweet Bruxism (teeth grinding) Morning jaw pain, worn teeth Wisdom tooth eruption Pressure and pain at the back of the mouth Sinus infection Upper tooth pain on both sides, pressure behind the eyes Frequently Asked Questions Why does

Scroll to Top